Friday, April 8, 2016
DIY Hexagon Shelf
I've been wanting to hot glue gun something for some time now and after seeing this from YouTube, I wanted to try it out for myself. I started this project not knowing where I and if I would use it, but glad that I did try. I couldn't go out to buy large popsicle sticks for this project because we had a looooong holiday, so I rummaged my mom's classroom for some. Haha.
First is glue together 3 sticks that will make half of your hexagon.
I tried different techniques but the best one I got, to make a symmetrical shape, is layer your 2nd half on top of the first one you made. Not gluing them together, but just using it as a guide so that when you lay the 2 halves side by side, they are perfectly pantay.
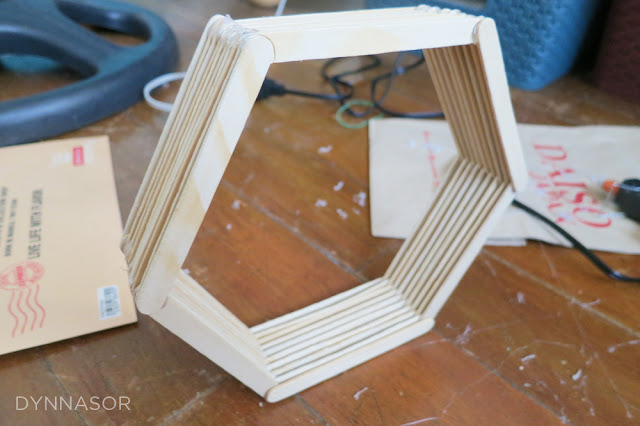
And then glue the 2 parts together.
Glue sticks alternately so that it will be level once you're done. Continue adding sticks until it's the thickness / depth you like.
I used 10 sticks on each side, for a total of 60 sticks per hexagon shelf. You can of course do this with bigger sticks so that the space inside will be bigger too. Or you can paint your sticks to your color of choice as well. I wanted the raw wood look so I stayed with this one.
I squealed a little when I tried to make it stand on its own and it did :)) At this point, I still had no idea what I want to do with these until...
I already had 5. Haha. I could improve more on the shape, I know :)) I looked around my room hoping to find a place for these babies and thought of putting it up with my current photo display.
I'm someone who DIY's without planning too much and just goes where a certain project will lead me. Hence the photo below :))
I texted this photo to the boyfriend and he was like, hmmm it's not right :))) I then thought of using a black & white fabric I recently purchased from ukay-ukay. I grabbed the thickest paperbag I have (relative to the other bags in my stash) and thought of covering it with the said fabric.
I cut them into hexagon shapes too.
I actually ended up with three pieces, I used another paper bag for the third one. And covered it with this fabric using hot glue.
And it ended up looking like this!
Ha! Too many hexagons but I like the difference it made in my room. I just recently placed the chest drawer against that wall and I thought that it deserved to be upgraded even in a simple way. I just used sticky tack to attach each hexagon shelf to the wall. I love how sturdy it turned out to be. As of posting, and it's been a week now, none of the shelves fell down. Whew.
I know there's a lot to tidy up in the construction part but it was fun to make these and get this kind of result so I didn't care anymore :)) So this is now my new morning view...
And a fun before and after!
Subscribe to:
Post Comments (Atom)


No comments:
Post a Comment