One of my favorite materials when DIY-ing is wrapping paper. I got a wrapping paper book last year from Divisoria and I already used it to make a vanity tray. And like any other DIY / organizing girl, I wanted another tray (or maybe a hundred more haha) and I also upscaled my mouse pad to match. Materials are pretty simple too - wrapping paper, scissors, a pen, and spray adhesive is all you'd need. I also used (a DIY-because-we-don't-have-it-here-in-the-Philippines) mod podge but that's optional.
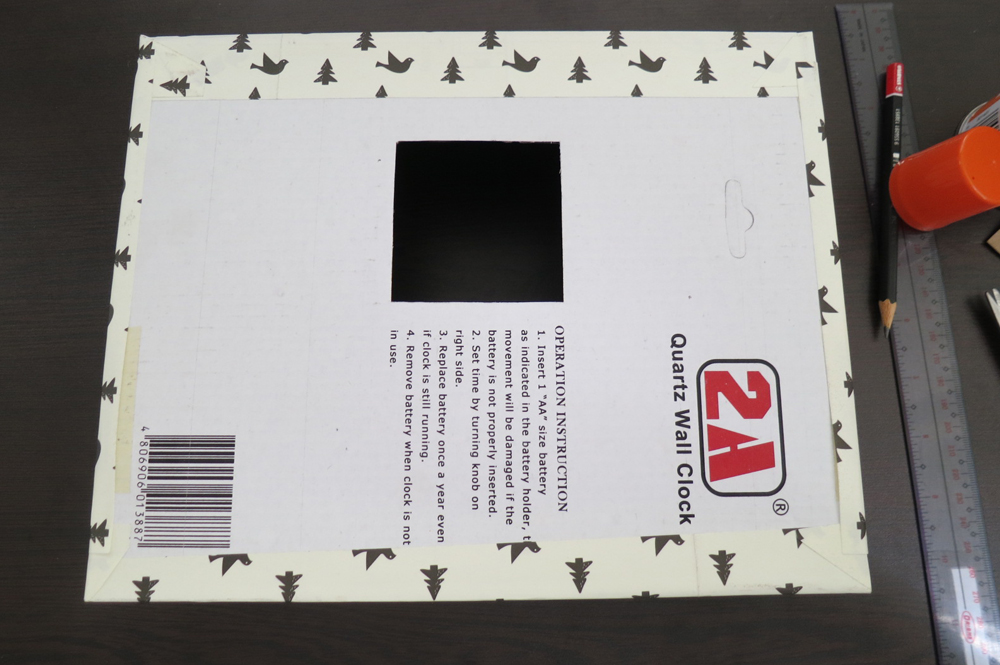
For the tray, I used a clock box this time. I love how sturdy it is compared to a shoebox lid. The process is pretty straight forward :)
I made it smaller to fit my office supplies better.
I completely and neatly covered the sides.
And covered the inside and the bottom with plain craft paper.
I was pleased with the finished product. Although, I could see some of the print through the wrapping paper I used. So for the mouse pad, I spray painted it first before wrapping it.
The top of course looked okay but when I flipped it...
Since it's just the bottom part and will almost never be seen, I didn't want to wrap it with pretty paper all the way through. I recycled a paper bag instead.
Now it looks neat :)
Oh yes, I really like it! :)
Here's the before and after shot!
I love how small and quick projects like this can make someone happy. Haha. I was scared to use the pretty papers at first thinking baka masayang but I think I'll use them up more easily now. Yay for wrapping paper! :)
We recently moved in to an apartment and I'm sharing a room with my sister. Although I've always dreamed of a room to myself, having my sister back means new bags, clothes, and accessories for me! We're used to sharing our stuff and that means shared storage as well. Of course everything started out as organized but one problem that came up in the 3 weeks we've been here is the area where we keep our everyday products.
Because the sides of the basket we used were high, it easily became a catch-all bin for essentials and even non-essentials. I'm planning to reorganize that whole black wire storage (together with other systems in our room haha) and fixing the top portion would be a good start.
Basic materials were a shoebox cover, wrapping paper, and spray adhesive. I also ended up using a pencil, a pair of scissors, and electric tape which you'll see towards the end.
I got my wrapping paper book from Divisoria last year and I love it! I love it so much that I haven't used them. Haha. Since it's the first time I'll be using this, I used my least favorite pattern for this project. As for the spray adhesive, I've been looking for one since I started DIY-ing (yes, I always window shop bookstores, department stores, and craft stores) and the moment I saw this, I just had to buy it even if I still didn't have a project in mind.

First is I measured off all the paper I'll need to cover the top and the sides (didn't mind covering the bottom anymore) and then I headed outside to apply the adhesive spray. You need to be careful when using spray adhesive because it's very sticky and there's a tendency that your paper will not even out neatly if you're not able to hold it properly. I liked using spray adhesive because it doesn't have the bubbly or wrinkle effect white glue has and it's less time consuming to use. Since I'm also using carton on paper, I didn't have any problem bonding them together.
Then you will have this. Yaaaaay! Not. Haha. I actually hate the part where the paper was folded (from the book) but it's going to be covered with products anyway so I got over it quickly. Haha. Another thing is this:
What's a DIY project without booboos? :)))) At this, I thought I was going to start over but I still opened my craft box hoping to find a life saver.
And I did find one in the form of a red electrical tape. Haha. I started applying tape on all the four corners. Which looked a little awkward. So I also lined the bottom of the tray. With some leftover paper, I also covered the holder I used for my toothbrush (which is actually a small can of Lays from a vending machine)
With a bit of purging and and organizing, I now have this...
Yay!! On the right are cans I got from Ikea for cotton balls and cotton buds. It's actually a set of 3 but the middle sized one is color black so my boyfriend automatically owns it haha. It's so organized I hope it stays this way especially when my sister gets back from her long hospital duty hahaha. And now a happy before and after photo!!