Showing posts with label do it yourself decor. Show all posts

Friday, April 1, 2016

DIY Dream Catcher


I recently rearranged my room furniture to get more floor space but because of that, I had to compromise symmetry in my room. Since then, I've been itching to DIY and update something to compensate for an OC violation :))


I made a DIY Macrame before and I thought of adding more to the wall space where this belonged. I didn't want to sway too far from what I already have, so I grabbed my extra rattan ring and a big ball of yarn my boyfriend gave me and experimented away.
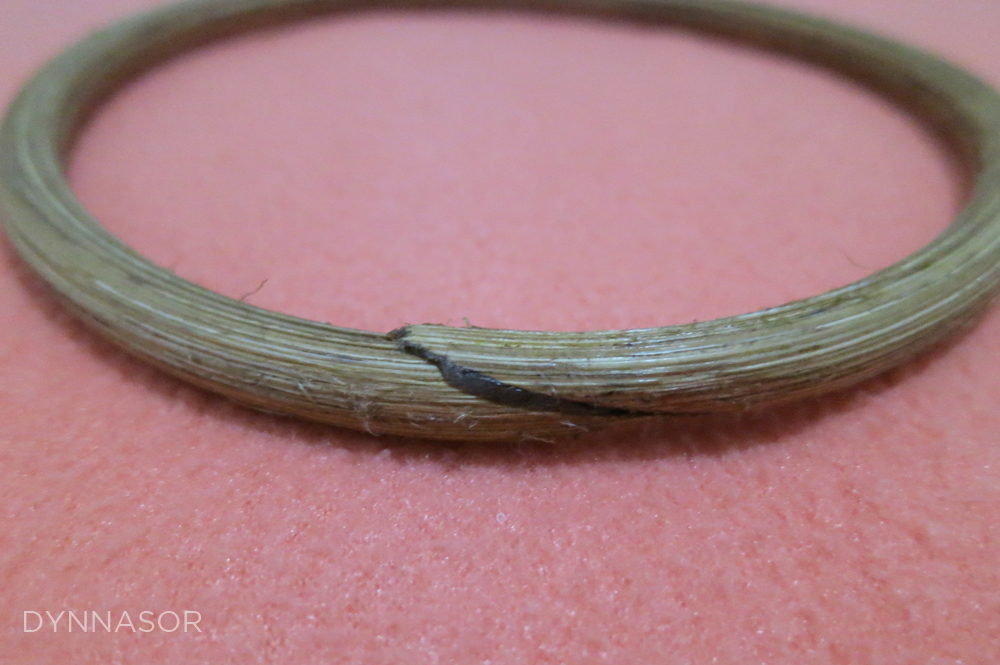
Materials I needed for this DIY Dream Catcher were simple. Josh got the yarn from a garage sale (I think!), and the rattan ring I got from Divisoria for P20 only. I also used scissors and a sharpie.


I wasn't able to measure how long my yarn was. It was such a big ball that it was hard for me to find the end, I just did my best to weave through it and cut what I thought was long enough :/ First is you'll tie one end to any part of your ring.


Then using your sharpie, mark out the rest of your ring equally. This is where you'd tie the rest of your string. To make it (the closest I can to) equal, I did it as how I would draw a clock. I imagined that the string I looped was 12. From there, I marked 6 (bottom), 3 (right), and 9 (left). And from those, I just marked the middle.


Loop around and tie a knot on all markers. The tighter, the better.


Then you'll have your first layer.


After this layer, the middle of each line of string will be your marker. 


Do the same thing as what you did on the first one, but instead of tying it onto your ring, you tie it to your string (rhyming!). And then your second layer is complete.


From here, your marker will now be the second layer of string. Just continue this process until your hole in the middle is small enough.


Just make a knot with another string to end it. Now, the tail is the easiest part. Others would use tassel or different ribbons but I just wanted to keep mine simple. I just cut out pieces of yarn of equal length.


Choose the ugliest portion of your ring. Then fold each yarn in half, and loop it around like so.


Just do this until you've got the whole area covered. And then you'll have this!


Yay! And to kind of balance this out, I made another one, with a random pattern.


I just used adhesive hooks to hang them and I now have a trio wall art of some sort.


This project practically didn't cost me anything because I already had all materials on hand. I officially used up all my rattan rings. But that yarn though. Haha.

Saturday, November 14, 2015

DIY Macrame

I've been fixing my room. For almost a year now. And I think it'll be a never ending process anyway :)) I've been wanting to add some wall art and I've been wanting to make a macrame since I bought some rope from Ace Hardware a few months back. I've also been drooling over these photos from Google until I had the chance to make my own.


I was actually already able to make this before but I wasn't able to document it. Also, I just used a makeshift rod and it was both the prettiest and ugliest thing in my room for some time. Haha. Fortunately, I was finally able to go to Divisoria again and and I bought a rattan ring. I think my friends were puzzled what I needed that for and this is the answer. Ha.

I've been reorganizing again and again in my room, shuffling furniture around, and I finally want to hang this macrame in this area right here:


This design project is super simple I'm thinking of gifting this to my friends for Christmas :)) Materials needed for this are the following:


The rope from Ace Hardware was kind of pricey at Php200+ if I remember correctly. This rattan ring is only P25 and the adhesive hooks are only less than P30 for 1 set from Japan Home.

The first step I did is optional, but I stained the ring using Bronco Oil Wood Stain in American Walnut. Yes, this is the wood stain I used in all my wood projects (frames, belt hanger, other DIY's that didn't reach the blog, etc. etc) because the can is still full and I think I can use this forever :))


I wanted to transfer the macrame I previously made to the ring but there's no possible way to do it without dismantling the whole thing. So...


I'm using 12 strings, at 80 inches each (I thiiiiiiiink). For the ring, use the ugliest side so it'll be covered up:


Fold your string in half, have the lose end go under the ring, loop and insert to a hoop you created with the non-lose end. Whew. In short, loop your string like this:


Hahahaha I'm now scared how I'll explain the rest of the instructions :))) After looping all 12 strings, you'll have this:


 You'll be working with the first 4 strings on the left:


 Get your first string, have it go over the next 2 strings, and under the last string like this:


Now get your last string, have it go under the 2nd and 3rd strings (to its left) then insert it to the loop the first string created:


Tighten it and you'll have this:


Continue working with the next 4 strings doing the same process...


And finally...


For the next layer, leave out the first 2 strands, and work with the 3rd to 6th strands.


Continue the process horizontally, leaving the last 2 strands.


Continue doing it until you get tired. Hehe. I chanted "over over under...under under loop" the whole time I was doing this. You might wanna try it also :))


I got bored with the design so I tried experimenting and tried a different pattern but still using the same knots...


Lastly, I cut off some excess strands, and you're done yaaaaay


Just hang it on the adhesive hook (which needs 24 hours before hanging anything on it)


Yaaaay. I'm now looking for other excuses to make more of these haha! :)

Tuesday, May 12, 2015

DIY Updated Office Board


I needed a board for my office. I wanted something to stick notes on - either a cork or magnetic board, plus something to write on - either a chalk or dry erase board. I searched the web for some DIY inspiration.
via


via
I had so many ideas, I already found it hard to decide what I really wanted. I think I want a magnetic board instead of a cork board for my notes since I have magnets I haven't used yet. But at the same time, I have fabric I want to use to cover up a cork board. I wanted to use glass as a dry erase board but I like the industrial feel of a galvanized metal sheet. I spent days and days bugging my boyfriend what he thought was the best option (and I thank God for a boyfriend who listens and does his best to input and be involved in my interests!!!)

As we were purging a lot of stuff in our school, I stumbled upon this piece


(If this belongs to any of my siblings, I'm sorry I took over it already, and thank you!) Well, it wasn't as stylish as I was hoping for but it had all the function I required.

I was okay with the wood finish. But I knew I had to update it since the cork part isn't usable anymore. And since I'm gonna do some upgrading, I thought why not go ahead and paint it as well. And that's what I did.


I covered the whiteboard area with craft paper and secured all the edges with masking tape. I didn't bother covering the cork anymore since I will cover it with another sheet. From scrap cork, of course.

 I didn't sand or prime. I just wiped it clean and spray painted away.


For the cork sheets, I just used scraps and attached them to get the size I need. I used spray adhesive to bond it to a cardboard.


I then completely covered it with burlap. I used spray adhesive for the front, and stapled the back. It was really simple.


And then I just used spray adhesive again to attach the whole thing back to the board. I don't know how long it will hold but if ever it comes off, I might use rugby to attach it again.


The black goes well with the spray painted pineapple juice cans I used to hold my pens.


I think a simple fix went a long way. I can't wait to hang this above my table!

I'm the type who always leans towards simple and less design as possible. Any person could do something completely different, design wise, but this is really perfect for me and my space. Again, this project cost me nothing, and that's probably one of my favorite things about my projects lately. Although, I'm already running low on burlap...haha.

I am so happy and excited how our simple office renovation gives me a lot of opportunities to make small projects and DIY's. I know it's probably going to take me months to complete my space but each little step is so fulfilling given that I made them.

Tuesday, May 5, 2015

DIY: Reupholstered Office Chair


Finally posting my first DIY for my tiny office! My office chair definitely needed some updating. I found a tutorial from HGTV Handmade Youtube channel and since then, I couldn’t wait to dismantle my chair. Haha. Here’s what it looked like before:


The fabric I used was once a dress I thrifted and I only bought it because I liked the print. And the fact that it only costs P30.00 was a no brainer. I kept it in my closet waiting for the perfect opportunity to fabricate (put fabric HAHAHA) something. I was thinking I’ll probably do a bulletin board or pillow but then it got to me, this was finally it, pancit!


I disassembled the chair. It was actually my very first time to unscrew something and it was fairly easy haha. The tutorial I found just reupholstered over the original fabric and that’s what I did. 


Measure and cut the amount of fabric you’ll need and staple away. I only used an ordinary office stapler for this one.


When I was finished, I tried putting it in its backing and it wouldn’t fit! Also, I realized that the foam was sooooo dirty so my mom helped me and washed it. I did it also for the larger piece. We let it dry overnight and did my best to keep my excitement for another day.


While letting the foams dry, I went ahead and removed the remaining fabric and staples at the back of the ply woods. It was really hard to remove them and I think I used every tool possible. In the end, I still wasn’t able to remove all but I think I was able to take out most of it.


The next day, of course I proceeded with my upholstery.


The back doesn’t look neat at all, but the end result was very nice!

 
Here it is screwed into the backing and its stem.


Let’s not forget the before and after photo which never fails to plaster a permanent smile on my face!!!

 An additional update I did was spray painting it to white. I would lie if I say I super love the outcome. But I guess that's part of DIY-ing. Trying and testing and learning from your decisions. Anyway, this was the process:


Unscrew everything again, lay it down on some scrap boxes or paper,  wipe everything clean, and spray paint away. I have no idea yet about priming and fixating so this is the only process I did. I applied 3 coats of paint and it was able to fully cover it.


Once the paint dried, I tried to fit the upholstered foam right away. Sino excited? :)))


I had a really big booboo for the back part. The plyboard and foam won't unscrew anymore so I tried my best to insert pieces of paper between the foam and the portion I'm about to paint. And well, though I was able to paint it, it didn't turn out as nice as the bigger piece. And it failed big time I can't even show it to you :(

But I can show you more photos of the back! HAHAHA.


I'm sorry for the messy background. But that's real life. Haha.


I would have wanted to also remove the adjusting rings below (whatever you may call it) but I have no idea how to remove them so I had to live with it. Overall, I'm happy with the result. I don't know if I'll reupholster some more in the future but I think this was already a good start. Now for the rest of my office. Yay! :)